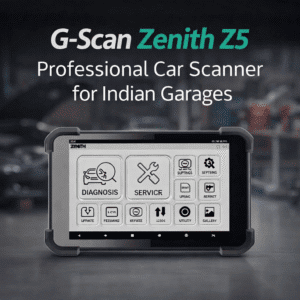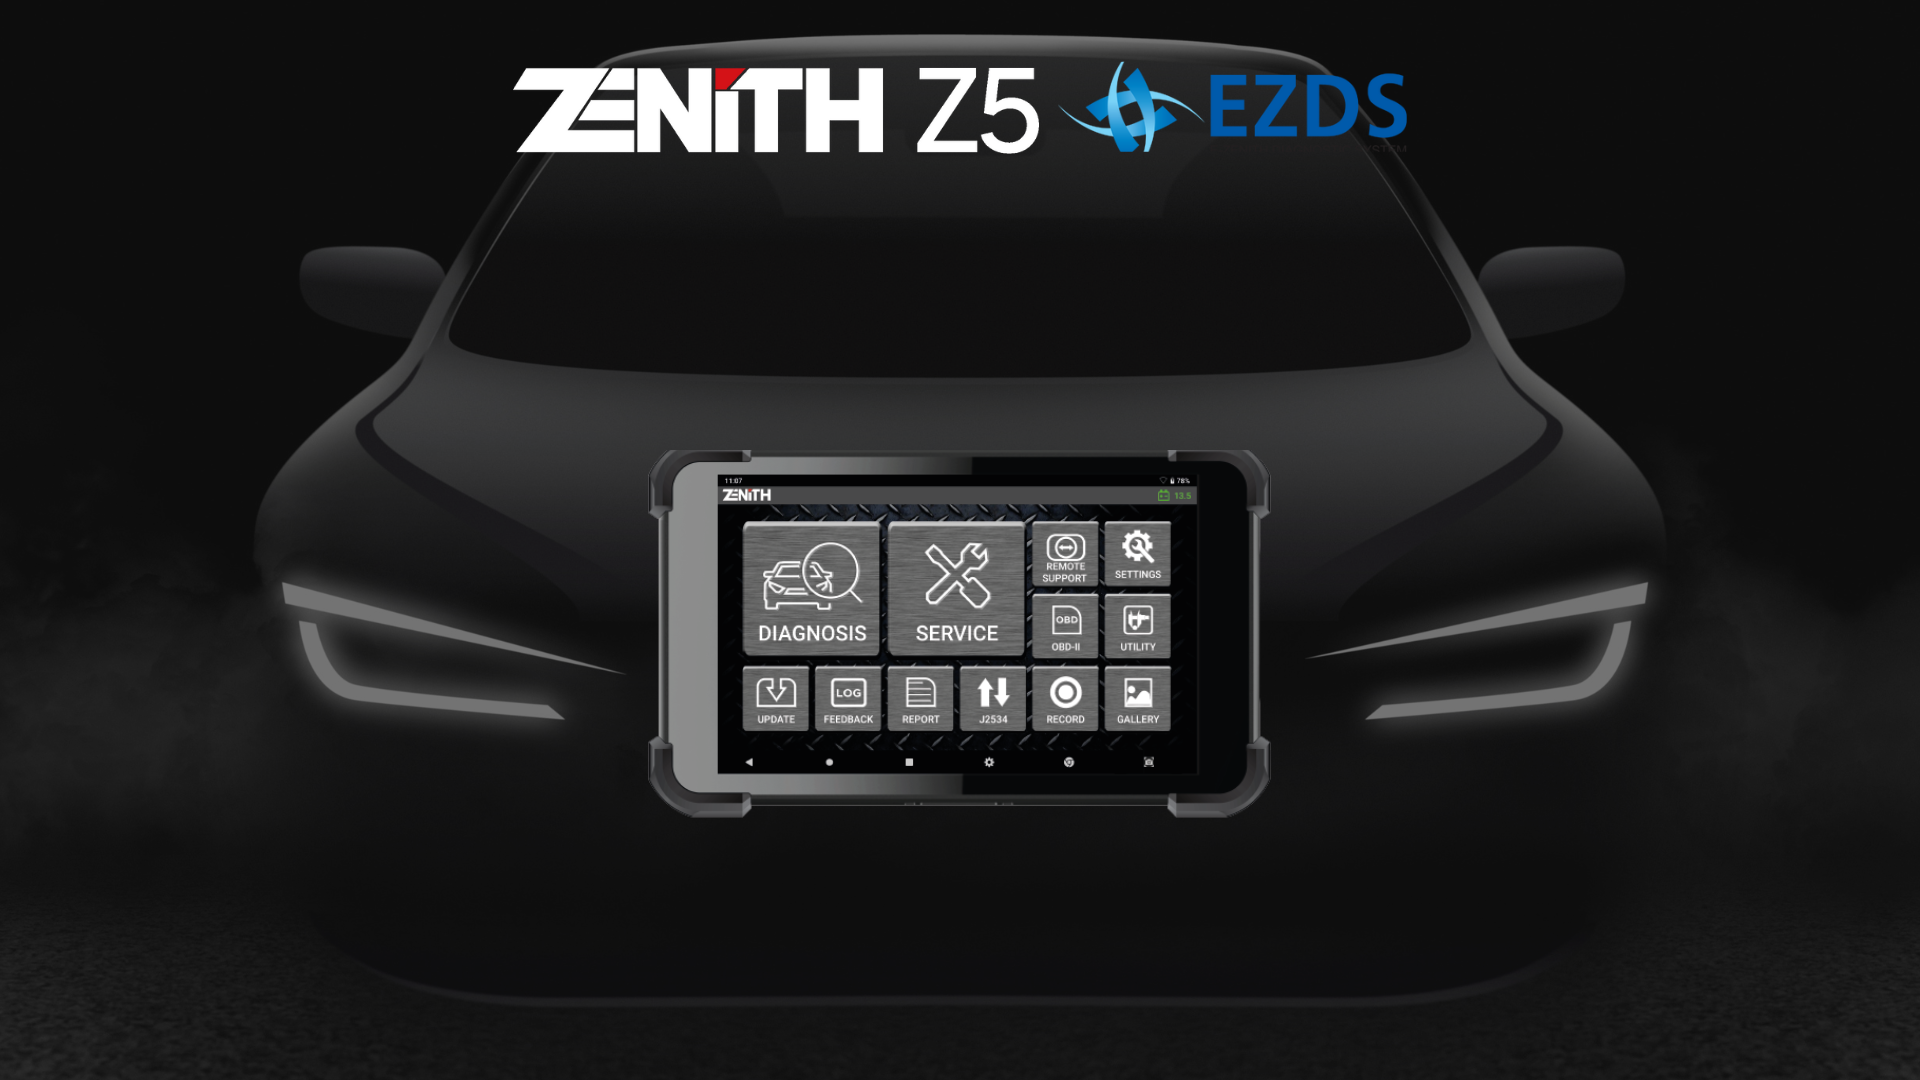
1.The G-Scan Zenith Z5 in Action: A Mechanic’s Real-World Experience
- In a mechanic’s life, two things matter most—speed and accuracy. When a customer walks into the garage with a blinking check engine light or a strange sound, you don’t have hours to guess the problem. You need a tool that gives answers fast—and the G-Scan Zenith Z5 delivers just that.
- This isn’t just a fancy gadget. It’s a serious vehicle diagnostic tool that has helped me solve some of the trickiest issues in both old and new cars. Let me share how I actually use this machine day-to-day—no fluff, just what works
- Why the G-Scan Z5 is More Than Just a Scanner
- You’ll find a lot of car scanning machines on the market, but most of them either support only limited vehicles or lack the deeper functions needed in professional workshops. What I love about the Zenith Z5 is how effortlessly it works on Asian, European, and American models. Whether it’s an OBD2 port or an older OBD1 system, it connects easily.
- I’ve used other brands before—some would read engine codes and stop there. But this tool digs deeper. It covers ABS, airbags, immobilizer, hybrid battery systems, and more.
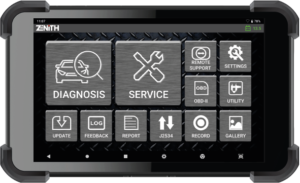
2. Setting It Up in the Garage
- The first time I used it, I thought setup might be a hassle. But to my surprise, it was simple:
Fully charged the device (you can use it while charging too)
Plugged the OBD connector into the diagnostic port (usually under the dashboard)
The scanner identified the vehicle model on its own—no need for me to search or enter VIN manually
3. Full System Auto Scan – Time Saver
- My favorite function? The Auto Scan. I run this when a customer brings a car with unclear symptoms.
- In just 2–3 minutes, it scans every system and gives a detailed report. I recently had a vehicle with no check engine light, but something felt off. The Auto Scan caught a hidden fuel trim imbalance that could have easily gone unnoticed.
- This kind of feature isn’t just useful—it saves hours every week.
4. Reading and Clearing DTCs – No Guesswork
- Diagnostic Trouble Codes (DTCs) used to require me to look things up on Google or in manuals. Not anymore. The Z5 explains the fault right on the screen.
- Got a P0301? It’ll say “Cylinder 1 Misfire.” And if you fix it, just hit ‘Clear Codes’ and the error vanishes from the system.
- This helps especially when I’m working fast—no guesswork, no second-guessing.
5. Live Data and Visual Graphs – A Technician’s Best Friend
RPM
Battery voltage
Coolant temperature
Oxygen sensor readings
Throttle position
- I once had a customer car that would randomly stall. No codes. But when I checked the fuel trim graph, I spotted wild fluctuations. Changed the sensor, and the issue was fixed.
- Visual graphs save me from scrolling through numbers and make it easy to spot abnormal readings quickly.
6. Special Features That Go Beyond Basic Scanning
1.This scanner isn’t just about reading codes. It offers special functions that make workshop life much easier:
Throttle body reset
Injector coding
DPF regeneration
Battery registration
ABS bleeding
- After replacing parts like the battery or injectors, I can immediately reset and reprogram the system. No delays, no errors later.
- This kind of functionality is why it’s more than a regular OBD car scanner—it’s a tool that gives full control to the technician.
7. Exporting Reports for Customers
- Customers love transparency. After a scan, I save the report and either print it or export it to a USB.
- Showing them what errors were found—and how they were fixed—builds trust and repeat business. It also justifies the pricing, especially when expensive parts like sensors or batteries are involved.
8. Tips to Get the Most Out of Your G-Scan Z5
1.Here’s what I do to keep the scanner in top shape:
Always update the software via Wi-Fi weekly
Use a stable power source while scanning
Keep the OBD connector tight—loose pins give wrong codes
Run Live Data even when there are no DTCs
Store it in a clean, dry spot after use
9. Final Thoughts – Worth the Investment
- If you run a garage or work solo as a mobile mechanic, the G-Scan Zenith Z5 is worth every rupee. It’s not just a code reader—it’s a complete solution that covers everything from engine diagnostics to battery testing and advanced functions.
- From car jump start diagnostics to deep automotive sensor testing, this machine has never let me down. Whether it’s a bike battery charger issue or a tricky transponder key, this tool gives you the edge.
- So the next time you want to up your game in the workshop, plug in the Z5—and let the machine do what it does best.